Reviewed and updated: November 10, 2026
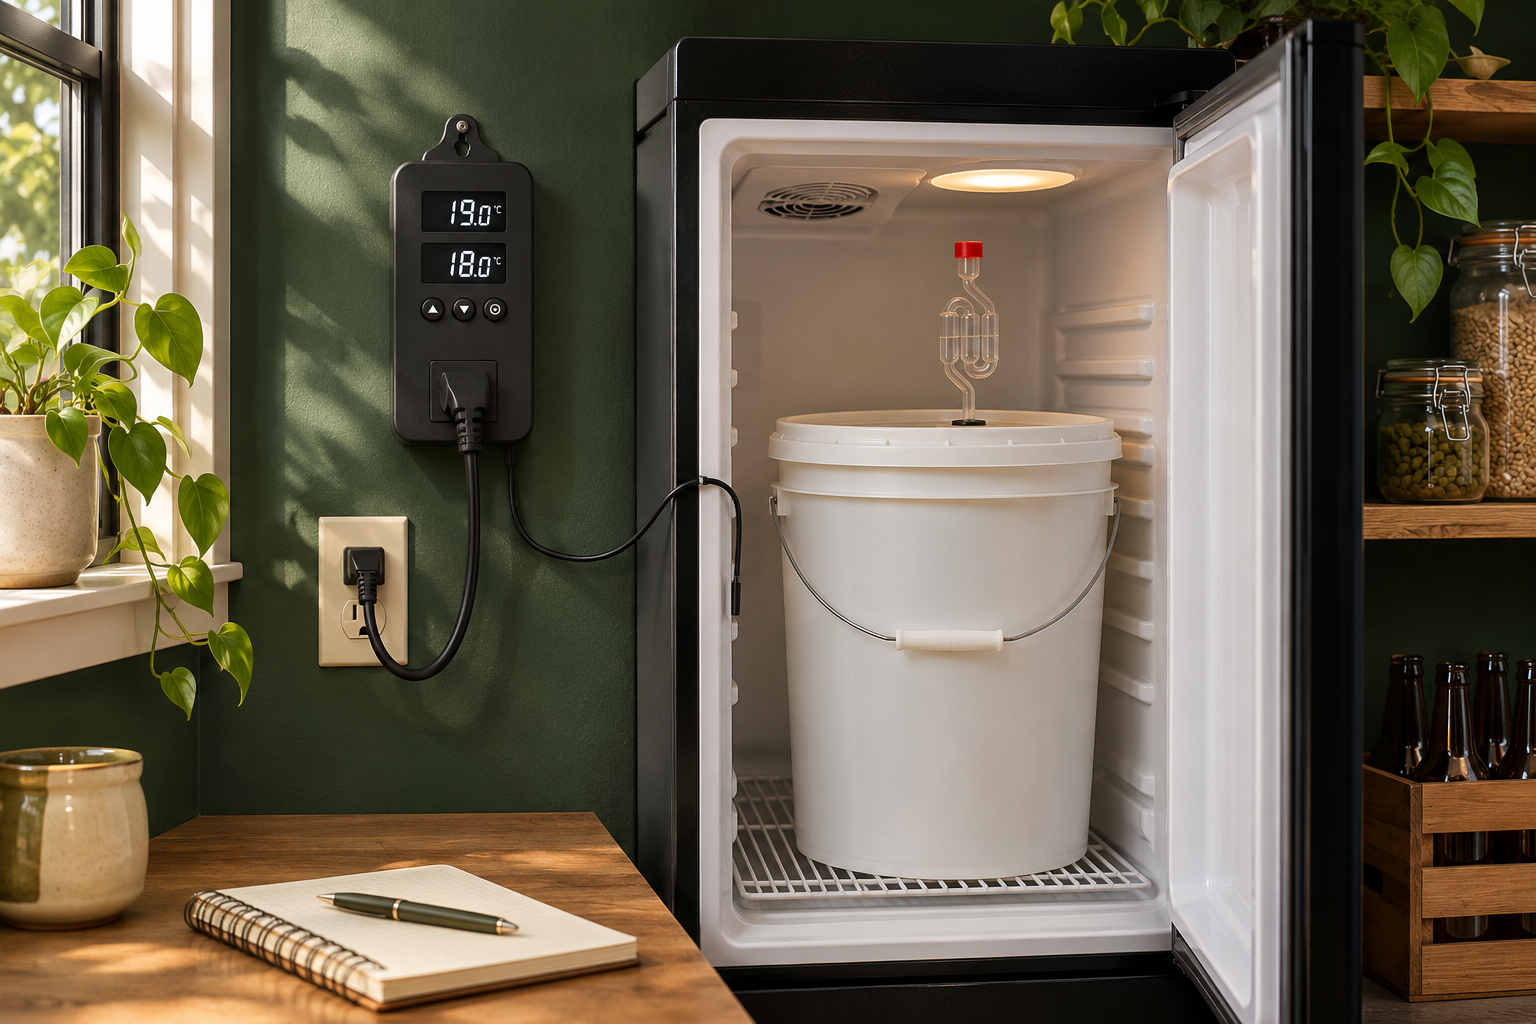
If you’ve got a suitable spare fridge and want more control over fermentation temperature, the standard INKBIRD ITC-308 is worth considering. We’d put it on the list for a single fermentation chamber you can check in person. Its local controls let you manage compatible heating and cooling equipment without building your own control panel.
It isn’t a complete fermentation setup, and the standard model doesn’t give you phone monitoring. The fridge, electrical compatibility, and probe position still need to make sense together. Get those basics right and the controller has a useful job: helping you look after a batch without constantly fiddling with the chamber yourself.
A straightforward role beside your fermenter
The ITC-308 has separate heating and cooling outputs, along with displays for the measured and target temperatures. That gives you an easy place to glance when you check on the beer. You can see the reading and the setting together rather than trying to remember where you left a dial.
INKBIRD also lists adjustable calibration, compressor delay, and high- and low-temperature alarms. Those are practical tools, but they still need the right settings and compatible equipment. An alarm is useful only if you notice it, so think about whether you’ll hear or see a problem where the chamber lives.
The standard ITC-308 is for local operation. If checking from your phone is a big reason for the purchase, compare the separately identified ITC-308-WIFI instead. It’s worth making that distinction at the start, rather than discovering afterward that you’ve bought the familiar-looking controller without the feature you wanted.
INKBIRD ITC-308 Temperature Controller
A local temperature controller for compatible heating and cooling equipment in a single fermentation chamber. Check the exact regional unit and appliance instructions. This button opens Amazon search results for the standard INKBIRD ITC-308, rather than the Wi-Fi model.
View on Amazon (paid link)
Start with the fridge you’ve got
Before buying the controller, look at the appliance instructions. You need to know whether the fridge is suitable for external switching and whether it returns to the intended operation after power comes back. A fridge with electronic controls can behave differently from a simpler mechanical one.
Check the electrical labels for the actual controller and appliance, including the compressor’s starting requirements. Regional versions matter. INKBIRD’s series page contains differing headline and specification figures, so use the documentation for the exact unit rather than picking a wattage from a search result. Ask qualified support if the electrical fit isn’t clear.
That may sound like homework, but it’s a short check with a useful outcome: knowing the equipment belongs together before you put a batch in it. There’s no need to turn the whole purchase into a technical project, and no benefit in guessing about the part that powers the fridge.
Make room for the batch, not just the bucket
Measure the fermenter with its lid, airlock, handles, and any fittings in place. Leave enough space to lift it in and out safely. A bucket that only fits with the airlock pressed against the top of the fridge is going to be annoying long before the beer is ready.
Think about the full vessel, too. The shelf or base needs to support it, and you need a comfortable way to move it. A controller can’t fix cramped access or an awkward lift. The nicest chamber is one you can use without dreading the moment you have to get the fermenter back out.
The fridge also needs an appropriate location, with the ventilation and surrounding conditions its maker requires. An appliance happy inside the house may not suit an exposed garage. Sometimes finding a better spot for the fridge is a more useful first step than adding new controls.
Where the probe sits matters
The controller works from the temperature its probe sees. Air inside a fridge and beer actively fermenting in a vessel don’t necessarily behave the same way. A quick change on the display doesn’t automatically tell you that the whole batch has changed by the same amount.
Choose a supported probe placement that suits your vessel and what you’re trying to monitor. If you’re considering a thermowell, check the probe fit and the fermenter’s instructions. Don’t drill the fridge or improvise a vessel modification just to make an accessory fit.
Keep the placement consistent and note it with your batch notes. That makes comparisons between brews much more useful. A separate suitable thermometer can help with a check when something looks unusual, without making you second-guess every ordinary movement on the screen.
Do you want an integrated or replaceable probe?
The standard ITC-308 has an integrated probe. INKBIRD distinguishes that from the plug-in probe on the ITC-308S. If easy sensor replacement matters to you, compare that difference before choosing, rather than assuming the similar names mean the same arrangement.
With the standard model, give the cable a sensible route where it won’t be pinched or pulled. Leave enough room to handle the fermenter without tugging the controller from where you’ve mounted it. It’s a small bit of planning that makes the whole setup less awkward to live with.
If you move equipment around often, serviceability may matter more than a familiar model name. For a chamber that stays put, the integrated arrangement may suit you well. We’d let the way you use the brewery decide which version belongs beside it.
Keep the powered parts out of the wet work
INKBIRD describes the probe as waterproof, but not the controller body or sockets. Keep the controls and connections dry and away from drips, cleaning solution, and fermentation overflow. A waterproof probe doesn’t mean you can wash down everything attached to it.
Look at how you’ll clean around the chamber before filling it. Hoses and spills need a safe route that doesn’t involve powered connections. Follow the care instructions for each part of the setup. You want the controller in a place you can read easily, reach comfortably, and keep out of the mess.
It’s also worth checking whether your fermenter already has controls that cover this job. Adding another controller can make things less clear if they work against each other. And if the question is whether the batch is progressing normally, checking fermentation progress may tell you more than buying a thermostat.
If you plan to put two fermenters in the same fridge, remember that one chamber and one sensor don’t create separate temperatures for different recipes. That’s a reason to think about what you’ll brew together. A shared chamber may suit similar needs, but the controller can’t turn one fridge into two independently controlled spaces.
Our take
We’d choose the standard ITC-308 for a compatible, accessible single-chamber setup when local control is all you need. Check the fridge, electrical fit, dry mounting spot, and probe route first. Compare another model for phone monitoring or a plug-in probe. Once those choices are settled, you can get back to the part you actually enjoy: making the next beer.