If you buy something through a link in our posts, we may get a small share of the sale.
Are you about to home brew and you don’t have an airlock? Why not build one for yourself from scratch then? Asides from being less costly than buying one, making your airlock also gives you more control over the quality of your brewing equipment.
Contents
How to Make an Airlock
Making an airlock is not complicated provided you get the right materials and follow the process of piecing them together to the letter. Also, a self-made airlock is cheap and efficient and can be used for a long time. There are two methods that could be explored:
Method One
Here is a list of materials you would be needing for the first method:
- A plastic bottle -a standard sized pill bottle should work
- A glass tube -perhaps a rifle cartridge or anything similar
- A tube with a diameter smaller than both the plastic bottle and the glass tube -a ballpoint pen casing should work
- A rubber cork- with a size that would fit the small opening on the lid of your fermenter
- Drill
- Glue
Durability of your airlock is essential and only getting high quality materials can guarantee this. Once the materials are on ground, follow this guide:
- Drill a hole into the bottom of the pill bottle. Ensure that the hole’s diameter is equal to that of the pen casing
- Remove the guts of the pen and stick the casing into the pill bottle through the drilled hole. Leave about half the length of the casing sticking outside, then seal the joining both on the inside and outside with glue to ensure it is watertight
- Insert the end of the pen inside the pill bottle into the glass tube
- Drill a hole into the rubber cork, then insert the end of the pen outside the pill bottle into the cork until it comes out at the other end
- Fill the pill bottle with water up to ⅕ inch below the level of the pen inside
- Drill a hole of about ⅛ into the cap of the pill bottle and cover the pill bottle with its cap
- Stick the cork end into the opening of your fermenter and begin fermentation
Method Two
Here is a list of materials you would be needing for this method:
- A rubber hose of about 15 inches.
- A medium-sized bottle
- Drill
- Glue
Again, durable materials only. Next, go ahead with making your airlock:
- Drill a hole right in the center of the base of the bottle. Ensure that the hole’s diameter is equal to that of the hose
- Insert the hose into the hole in the base of the bottle. Push it in until it reaches the neck of the bottle, with about half its length sticking outside
- Insert a stick -such as a marker- through the opening of the bottle and use it to push the tip of the rubber hose inside the bottle in opposite direction until it forms a curve
- Seal the base of the bottle where the hose is inserted with glue to ensure it is watertight
- Pour some water into the bottle. Ensure that the water reaches past the opening of the hose inside the bottle
- Stick the tip of the hose outside the bottle into an opening in the cover of your fermenter, and begin fermentation
The advantage of this method is that due to the curve of the hose, which is a tad bit similar to the curves present in an S-shaped airlock, the chances that water from the airlock will be sucked into the fermenter are greatly reduced.
How Do Airlocks Work?
An airlock, also known as a fermentation lock, is equipment attached to a fermenter, to serve as an outlet for carbon dioxide that is released during fermentation without allowing oxygen to get into the fermenter. As the yeast feeds on the sugar content in the wort, alcohol and carbon dioxide are created.
The carbon dioxide rises to fill up the headspace above the liquid. The more carbon dioxide is produced, the greater the pressure that builds inside the fermenter. Eventually, the pressure goes beyond the maximum level that the fermenter can take. When this happens, it could lead to the fermenter rupturing.
However, with an airlock present, the carbon dioxide in the fermenter will gradually push its way into the airlock, which is usually half-filled with water and positioned on the top of the fermenter. Then the carbon dioxide forms bubbles in the water and escapes through an opening in the lid of the airlock.
Types of Airlocks
There are two main types or designs of airlocks. The main difference lies in their shape which causes both airlocks to vary in terms of how they function and ease of maintenance. They both do a great job, so your decision would boil down to preference:
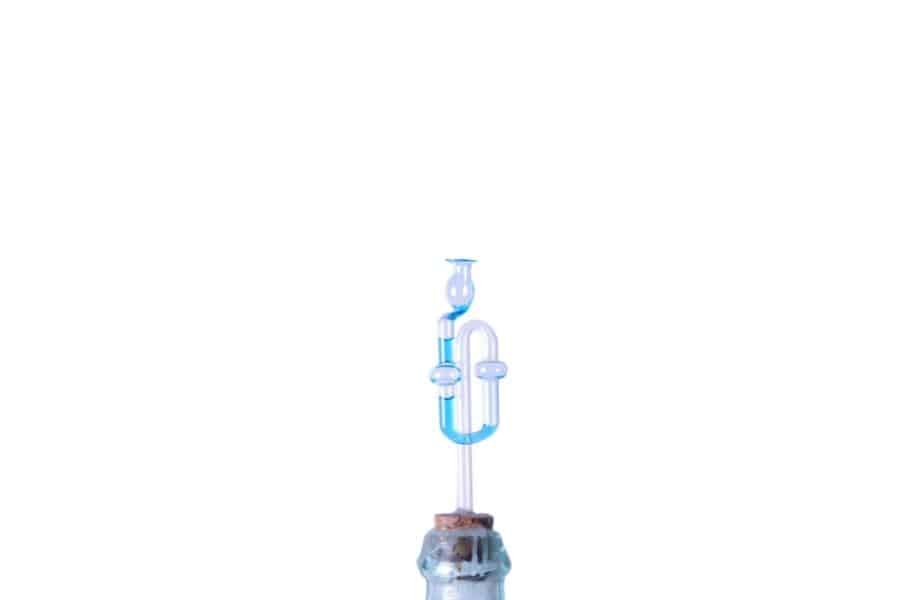
S-Shaped Airlock
As the name implies, this airlock is designed with a single piece of plastic shaped like an S. To prevent oxygen from getting in through the airlock to your wort, some part of the airlock is filled up with water.
When carbon dioxide begins to build up inside your fermenter, it pushes through the water, making bubbles as it rises, and then passes through the s-shape until it’s completely out of the airlock.
One advantage of the s-shaped airlock is that thanks to its special design, the pressure inside the fermenter would hardly be able to draw water from the airlock into the wort. On the downside, however, this type of airlock is very difficult to clean in cases where some of the wort gets into the airlock.
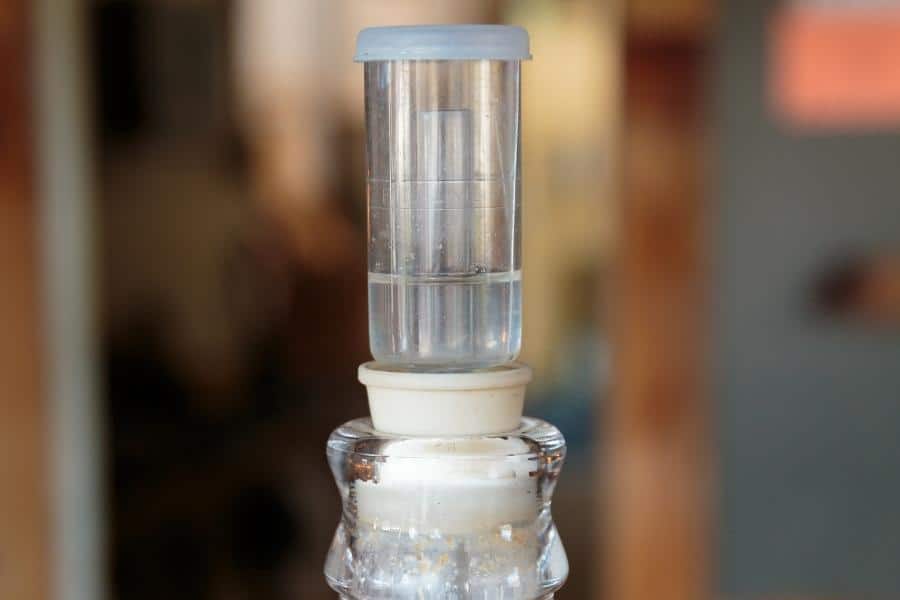
Three-Piece Airlock
This is the type of airlock whose construction is explained above. It consists of three pieces -a base with a stem, a tube, and a vented cap. When carbon dioxide begins to build in the fermenter, it passes through the tube and the stem and then bubbles through the water and out the vented cap.
This type of airlock is very easy to clean, as all its parts can be detached. However, there is an increased risk of the pressure in the fermenter sucking in water from the airlock into the wort.

Frequently Asked Questions
What Are the Benefits of Fermenting My Beer With an Airlock?
Some people believe that airlocks are not entirely necessary to the homebrewing process, but here are some benefits that airlocks offer:
- Allows carbon dioxide produced from fermentation to be released
- Prevents your fermenter from rupturing due to excess buildup of pressure
- Prevents oxygen from getting into your fermenter
What Are the Benefits of Fermenting My Beer With an Airlock?
When bubbles are rising through the water in your airlock, it simply means that fermentation is taking place already. While fast bubbling indicates a speedy fermentation, slow bubbling indicates a slow fermentation, and no bubbling indicates that your fermentation has stopped or has been completed.
However, if it has only been a few days into fermentation and your airlock has not started bubbling yet, a very likely cause is that the carbon dioxide is escaping through another means. In that case, you should check the lid of your fermenter to ensure that it is not loose.
Conclusion
Fermentation is perhaps the most important stage of beer brewing and a lot of attention has to be paid to ensure that it is completed successfully. One way to ensure a successful fermentation is to make use of an airlock. To build one for yourself, you should follow the procedure I have detailed above.
