If you buy something through a link in our posts, we may get a small share of the sale.
Distillation comes right after fermentation and has to do with the separation of alcohol from water through evaporation and condensation. Distillation is usually carried out in a still and requires some important equipment to produce quality final results. A crucial piece of equipment required for distillation is a thumper keg.
In this article, i’ll teach you how to build your own thumper keg.
Contents
How to Build a Thumper Keg
Before getting into the ‘how’, a thumper keg, also called a doubler or thumper barrel is an equipment that is positioned between the still pot and the condenser and is used to distill beer a second time without it having to go through the still pot again.
Usually, on the first run, a still pot can only create a wine with an alcohol level of about 40 -50%, which is quite low. To create high proof spirits, you would have to distill your liquid through the still pot a second, and in some cases, a third time. This process, although effective, is time-consuming and very expensive.
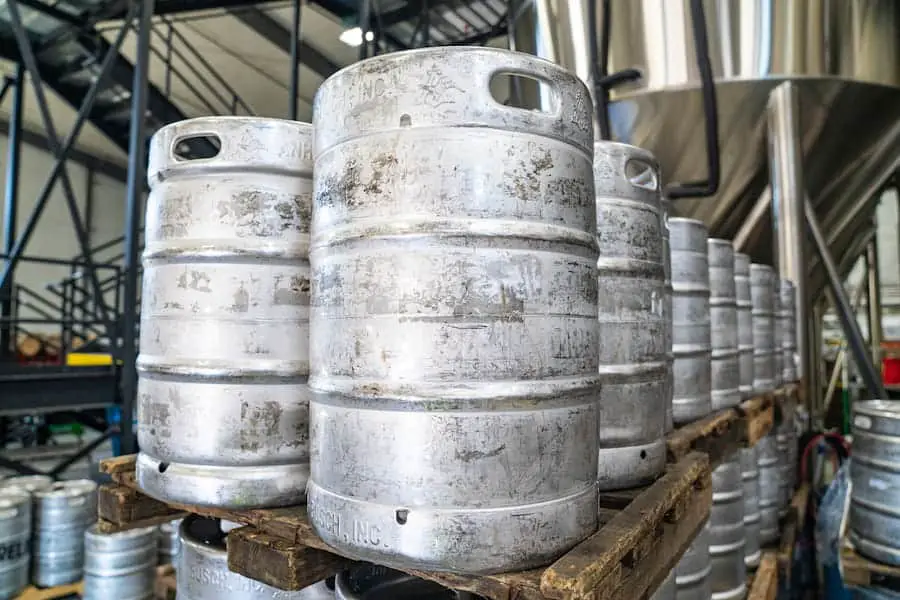
However, what a thumper keg does is that it speeds up the distillation process by collecting low proof alcohol and reheating it in order to create high proof alcohol. Typically, a keg will last for around 45 to 60 days.
Now, to build your own thumper at home, here’s a list of materials you would need:
- Non-reactive vessel. This could be a soup pot or any other container, but it has to be between half and a third the size of your main still pot.
- Two pipes, elbows and t-fittings. The t-fittings are not entirely necessary, but they add durability.
- Two copper unions that fit the openings of the condenser and the still pot.
- Two spring loaded clips
- Four nut bolts, preferably made of stainless steel because it is non reactive.
- Four flat washers and four spring washers
- Gasket material
- A drill
- Vinegar and alcohol
- Liquid soldering flux and solder
Building a Thumper Keg
- Measure the position that the spring loaded clips will be attached to on the side of your vessel. While doing this, make sure to leave room between the edge of the pot and the lid for the gasket material to occupy.
- Drill out four to six holes in total, two or three on each side, and then attach your clamps.
- On the inside, cover the protruding tip of the clamps with a little gasket material to prevent leaks. Next, go ahead to make use of your flat washer, spring washer and nut bolt to fasten the spring loaded clip (two of each fasten to one spring loaded clip).
- Drill two holes into the cover of the pot and insert your pipes; the inlet pipe, leading to the still pot and the outlet pipe, leading to the condenser. Try your best to ensure the holes fit the diameter of the pipe closely. Basically, the tighter, the better.
- Insert your inlet pipe, making sure that there is a space of at least a half inch between the pipe and the bottom of the pot, while the rest of it sticks out.
- The outlet pipe should only protrude about half an inch into the cover of the pot, while the rest of it sticks out.
- Add flux and solder to the inside of the pot cover, around the pipes and apply heat to attach the pipes to the pot.
- Attach the t-filling to the middle of the pipes. The t-fillings are not exactly necessary, however they are good to promote the sturdiness of the pipe, which is great, considering that there will be consistent thumpings and movements. Repeat the fluxing and heating to make sure it sticks.
- Solder on your elbow and copper unions.
- Apply your gasket material which could be a thick non-melting and non-reactive tape- around the rim of the pot to keep vapor and liquid in.
- Now that it is all done, you need to check it for leaks. Fill the pot up with water and turn it upside down and around to make sure there are no leaks. Do an air check too by blowing air into the pipes and listening for leaks.
- Clean with vinegar and alcohol to get rid of any flux or solder remnants.
How to Build a Mason Jar Thumper
When building a thumper, glass is not exactly your best option because they have a high chance of shattering. However, if you need a thumper keg urgently, and a mason jar happens to be your closest or quickest resort, here is a list of the materials you will be needing to build it, and a step-by-step explanation of how to go through with it.
- A half gallon mason jar, which will serve as the vessel
- Mason jar lids made of copper
- A mason jar seal
- Pipes made of copper
- Bend fitting made of copper
- Soldering wire made of copper
- A soldering machine
- A saw
If you do not already own the last two, rather than buy them, you could save costs by borrowing or renting them from a neighbor or a friend.
Right before you get to assembling your mason jar thumper, building a gasket ahead of time is advised. If you don’t want to spend time doing this, you could easily order the complete kit. The kit typically comprises the piping, jar lid, and seal, all made out of copper.
Stainless steel is another material that can be used, however, copper is preferred for the following reasons:
- Copper is easy to weld
- Copper improves the taste of your alcohol
If you have gotten all of the equipment listed above, here is a step-by-step guide to building your own mason jar thumper:
- Cut your pipes into the right sizes. Ideally, there should be a short one and a long one. The long pipe should be the length of the mason jar, and should reach the bottom of the jar when inserted. Your bend fitting comes in at this point. Attach it -through soldering- to the end of the long pipe and position it at the bottom of the jar.
- Drill two holes into the mason jar lid. These holes should be as close to the diameter of the pipes as possible. The short pipe should stick out of the inside of the jar lid by about 1 inch.
- Apply your soldering wire round the holes on the lid, and heat it up, making sure to concentrate the heat on the pipes and not the lid.
- This is the final step to building your mason jar thumper and it involves assembling it. Insert the seal in between the gasket (lid) and the glass before screwing the lid on. This ensures that the thumper is airtight.
How to Add Flavors Using a Thumper Keg
One of the benefits of having a thumper keg is that it can be used to induce flavors into your beer. For instance, if you want your beverage to have a strawberry flavor, you could add strawberry extractors into your thumper keg right before the second distillation process occurs.
Of course, you already know that before you start distilling, there has to be some liquid content present in your thumper keg that acts as a cooling agent for the heat vapors that would be coming in. Here is a list of some of the things you could add to a thumper keg:
- Some spirit from a previously distilled batch -this is your best option.
- Some wash from the current batch
- Water -this should be your last resort.
- Fruits
- Herbs
- Spices
Here are some different methods through which you could add flavor to your beverage, using your thumper keg:
Adding Fruit-Infused Spirits Into Your Thumper Keg
This method involves placing the fruits, spices, and herbs of your choice into a bowl that already contains some low wines or head/tail spirits. Ideally, you should leave this combination for between 7-14 days, to ensure that the flavors from the spices properly pervade your spirits.
Then when you are ready to distill another batch of wash, you add the fruit-infused spirit into your thumper keg and go ahead to distillate. The flavors from the liquid will no doubt show up in your high-proof alcohol.
Adding Juice or Oils Into the Thumper Directly
This is a simpler and faster way to impart flavor into your alcohol. All you have to do is add liquid ingredients, such as fruit juice of any flavor, and some coconut oil directly into your thumper before distillation.
Adding Raw Ingredients Into the Thumper Directly
Here is another tested and tried means of infusing flavors into your alcohol. It is a combination of the first two methods already spoken about and involves you adding herbs, spices, fruit peels, or fruit juice of your desired flavor right into your thumper keg. The only downside to this method is that it could get messy and would require extra cleaning for your thumper.
One thing to note while adding liquid to your thumper keg is that it should not exceed more than 20% of the thumper capacity to prevent overspilling.
How to Clean a Thumper Keg
Cleaning your thumper keg is very important to ensure that there is no growth of bacteria that could either infect your alcohol or affect the taste. However, cleaning only has to be carried out for new thumper kegs, and then three times a year subsequently.
- Fill up your boiler to about 20% of its volume with hot water -preferably distilled- and vinegar. The water-vinegar ratio should be 50-50.
- Begin distillng from your still pot as though you were making alcohol.
- Let your still pot reach a temperature of 170 degrees Fahrenheit. Leave it at that temperature for a period of about five minutes.
- The next thing to do is to turn off your heat and leave your equipment to cool down. Then empty the solution from your thumper and you are good to go.
How to Determine the Suitable Size for Your Thumper Keg
Determining what size your thumper keg should be could seem like a major struggle. However, it does not have to be. The one thing you should note is that your thumper keg is not stand-alone equipment. It works hand-in-hand with the still pot and the condenser to produce alcohol. Hence, the determining factor of its size is the size of your still pot.
Your thumper keg can be anything between 25 and 40 percent of your still pot, no less, no more -except you have plans to distill large amounts of wash at a time. In that case, your thumper keg could be about 50% of your still pot.
Overview on Thumper Kegs
If you are an upcoming home brewer, you are most probably new to the process of distillation. You also may not have a solid idea of what a thumper keg is and what it is used for.
Is Using a Thumper Keg Worth It?
Yes, it is. To prove this, you would need to understand how the thumper keg helps to increase the alcohol content of your wash-fermented liquid. Here, I shall break it down for you.
When the still pot heats up to a boiling point, heat vapors are released, but rather than go straight to the condenser, they go into the thump keg via a swan neck. In the thumper, there is already some liquid content. The heat from these vapors then causes the content of the thumper to hit the boiling point again, hence, generating more alcohol vapors, which then escape into the condenser.
What Materials Are Used to Build Thumper Kegs?
Although thumper kegs can be built with different materials, it is important for you to note that some materials produce better results than others. A high temperature needs to be maintained in your thumper for the contents to be distilled a second time. This means that the best materials to use are those that have a high capacity to absorb and retain heat.
Here are some of the most common materials used to make thumper kegs:
Wood Thumpers
Moonshiners and a number of other distillers prefer using thumper kegs made of wood because wood provides great insulation and traps heat better than metals. The low wine is kept warm, thereby ensuring that once the vapors hit, it is properly distilled.
Copper Thumpers
Not only is copper great at conducting heat, but it could also improve the taste of your beer by removing some of the sulfur compounds in the alcohol, hence enhancing the flavor. This is why it is highly favored amongst distillers.
Glass Thumpers
Glass can be considered the most common material used to build thumpers because it is quite flexible. Mason jars are very compatible with glass thumpers, provided you have thumper kits that can fit on top of the mason jars. However, only use distiller grade glass, and not just any random glass jars, as they are very dangerous.
This is because they could shatter and spray glass and heated liquid all over and cause some serious damage.
Why Build a Thumper Keg?
The following are benefits of having a thumper keg in your distillation process:
Temperature control
Thumpers used to be used to control temperature during earlier times when wood fires were used. However, that function is not exactly applicable now as automatic temperature controls and other means have been developed.
Used for a Second Distillation
Thumper kegs are a faster and cost-effective way to increase the alcohol level in a beverage without distilling it again. The good thing about thumper kegs is that they do not double the ABV of your beverage, but only increase it by about 10-20%, depending on the material it is made of.
Flavor enhancement
Thumpers are a good way to add flavor to your alcoholic beverage. You can do this by adding the flavor into the thumper before the heat vapors are released so that as the liquid distills, the flavor goes into the condenser.
Frequently Asked Questions
What Is the Best Liquid to Use in Your Thumper?
There should always be some liquid inside your thumper before you begin a distillation process. This liquid serves as a cooler for the heat vapors that enter into the thumper. This liquid eventually heats up, turns to vapor, and is trapped inside the condenser.
Here are some of the liquids that you can put into your thumper.
Tails From a Previous Batch
This is literally the best liquid to use in your thumper. Using tails from a previous batch ensures that you get a higher level of alcohol as the liquid heats. When using tails, make sure they are from your earliest batches, as these are the purest kinds.
Some of Your Current Wash
This is a good option for thumper liquid. Although your current wash will not have as much alcoholic content as tails from a previous batch, it is not an entirely bad option since it still has some alcohol content. Another good thing about it is that it is readily available for use since it is part of your current wash.
Water
As mentioned earlier, this should be your last resort, because it is better than nothing. This is because, with water, you are losing the added benefit of using something that has some alcoholic content in it. If you do not have tails from a previous batch and cannot spare some of your current wash, you could use water.
Just bear in mind that you would be getting a lower alcoholic content from your distill.
What Is the Difference Between a Slobber Box and a Thumper Keg?
What a slobber box does is that it catches any spillage from the still pot. However, after it does this, it does not heat up the liquid as the thumper does, hence, produces no extra alcohol. Simply put, its function is to collect whatever sediments the still pot spills as a result of overheating.
Thumper kegs, on the other hand, collect vapor from the still pot and use it to heat the liquid content inside them to produce high-proof alcohol.
What Happens When a Thumper Is Too Big?
Surely, by now you know that a thumper can be too big. When this happens, or when you have too much liquid in your thumper, the result is that the incoming heat vapors will not be able to heat up the liquid properly and the liquid will end up diluting your vapors. If your liquid is not heated up to the point where it can produce alcohol, the whole process of distilling with a thumper keg will turn out to be pointless.
On the other hand, if your thumper is too small, or you put too little liquid inside of it, it will lead to the liquid inside it heating up too quickly from the incoming heat vapors. Then this time around, the vapors will only bubble through the liquid without getting cooled and go straight into the condenser. The end result is that they do not produce any more alcohol, which again, makes the whole process pointless.
Conclusion
Congratulations on the knowledge you have just gathered about thumper kegs, and how to build one for yourself. As you go ahead to apply this knowledge, ensure that you follow all instructions to the latter, to ensure that you produce alcohol of the best quality, and to also promote your safety during the distillation process.

