If you buy something through a link in our posts, we may get a small share of the sale.
A fermentation chamber offers optimal temperatures required for fermentation. When building your chamber, ensure you have the right materials to create more room than you need. It is a long process, and not everyone can learn how to build a fermentation chamber.
Contents
DIY Fermentation Chamber Build Plans
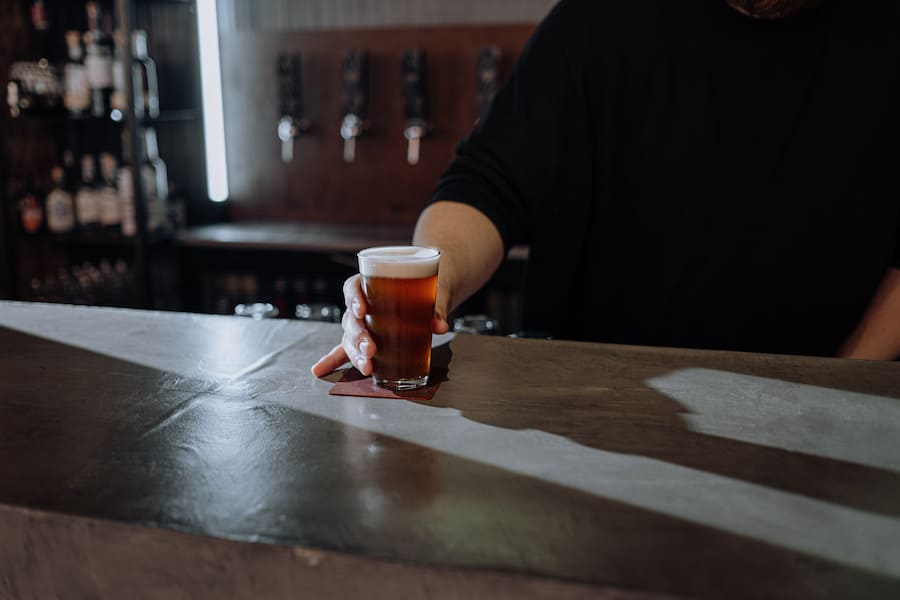
You can use several tools to build a chamber, helping you regulate fusel alcohols and ester profiles while fermenting beer. If you build it properly, the result is better homebrew and fine-tuned control, and development of your technical skills. Below is how to build a chamber and the equipment needed.
Equipment
- Casters (optional): They are undriven wheels designed to attach at the bottom of a large object to enable easy movement.
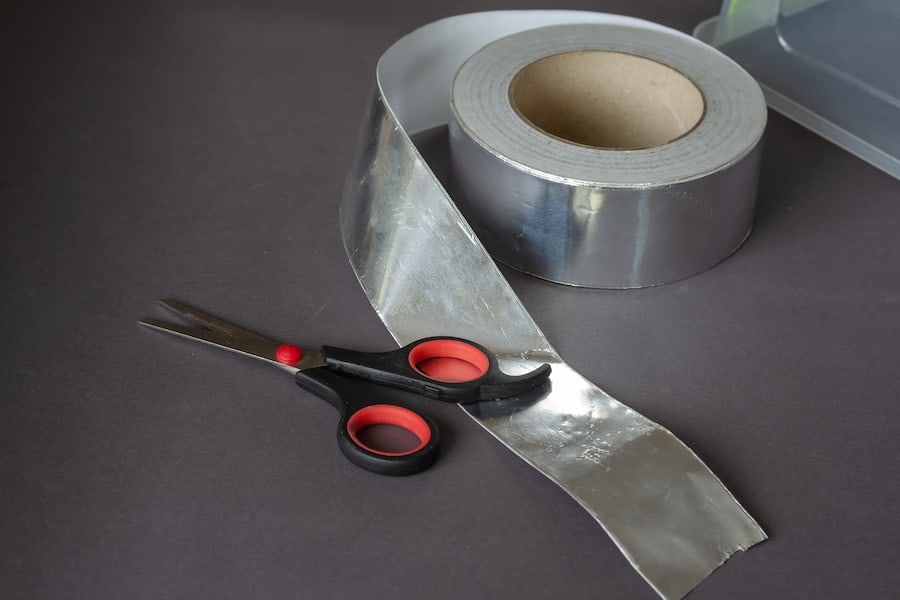
- Aluminum tape: It has a rubber-based pressure-sensitive adhesive. It offers a perfect barrier to vapor and conforms to irregular surfaces.
- Foam tape: It is ideal for insulating, cushioning, heating pad, gasketing, sound dampening, and sealing. It also enhances the appearance and improves the overall performance of a chamber.
- Drill: A tool used for driving fasteners and making round holes
- 8 or 10 x 2.5 inches screws
- Utility knife for foam insulation
- Circular saw or table saw: Ideal tools for cutting the oriented strand board
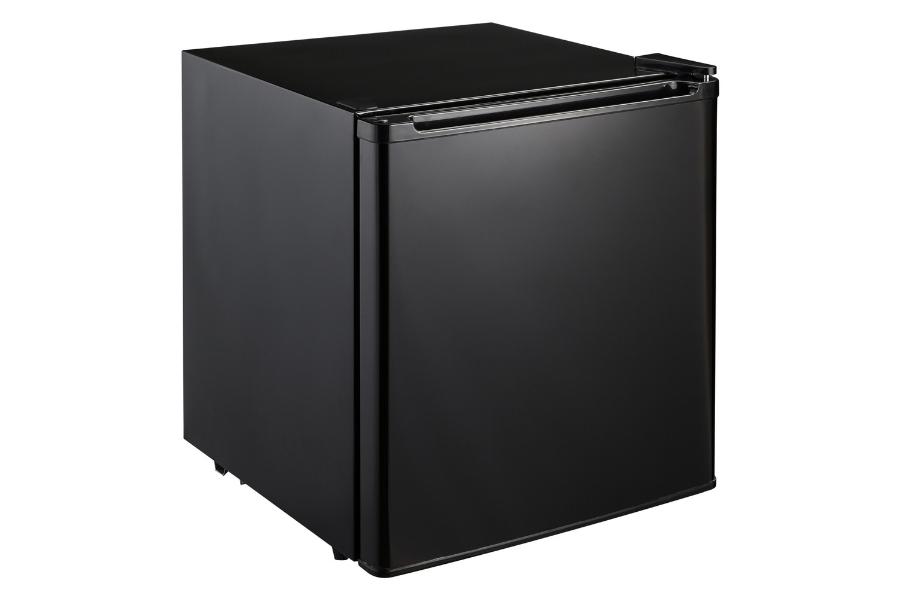
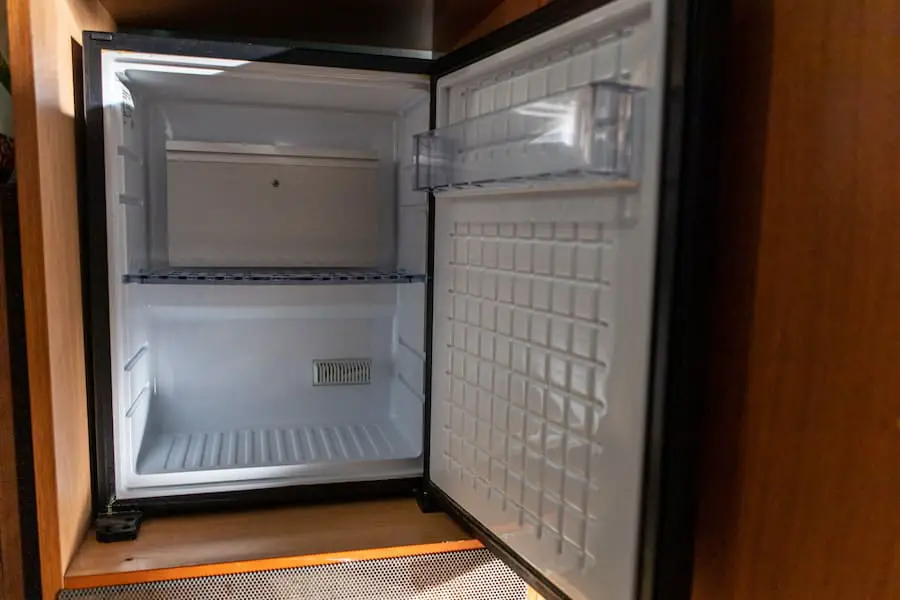
- Old or new mini fridge: It provides a cooling source when the interior of the chamber gets too warm.
- 7/16 inches thick 4 x 8 feet oriented strand board: Ideal for floor underlayment and wall sheathing
- 1 inch thick 4 x 8 feet Rigid foam sheets: Prevents seepage of moisture in the chamber
- 2 x 4 Lumber
- Temperature controller
- A heat source (optional): It offers heat when the ambient temperature in the fridge is too low. You may use heaters, heat mats, light bulbs, and black bulbs.
- Fan (optional): allows air circulation around the fridge, preventing hot and cold spots inside the chamber.
- The quantity of lumber required depends on how many fermenters you want to accommodate and the size of your fridge. You require at least that much-oriented strand board and almost double rigid foam insulation in whatever area you want to place your chamber.
Homemade Fermentation Chamber Instructions
Below is a step-by-step procedure that you should follow when building your fermentation chiller:
Prepare the Refrigerator
Remove the door of your mini-fridge as you are building an extension to make the cooling area of your fridge larger. Also, keep in mind that a clean seal between the fridge and the extension is required.
When cleaning the fridge, use a good sterilizing product to scrub and disinfect all the surfaces properly. Removal of the door makes adding the extension much easier. The more challenging accessing the fridge internals will be as the building progresses, so ensure you thoroughly clean your fridge inside and out.
Build the Base
Building the base is the first customization begins. Make sure the depth of your base is equal to the width of your fridge. Its height depends on the number of fermenters you want to accommodate at a go.
Remember that in this step, the power of your fridge comes in, and a smaller temperature-controlled area is easier to control than a bigger one. So, you should be aware of how many beers you want to ferment at the same time that have the same temperature requirements.
Build a 2 x 4 frame for the base. Avoid attaching the casters at this point as they make attaching the top and bottom frames difficult. Cut a piece of OSB that matches the dimensions of your 2 x 4 frame, and screw it down.

Build the Top and Attach to the Base
Ensure the interior dimensions of the top frame are 3 inches wider and longer than the base. In turn, this creates room for attaching the vertical supports that offer a tight fit for your fridge. Measure the height of your fridge and make your supports tall enough to reach the top of your top frame and the bottom of your base frame.
To make the whole process easy, attach the supports to the underside of the top first, then flip the entire top to attach it to the base. Before attaching the supports to the top or base, position your fridge where you want it on the base.
Ensure the back of the fridge is at the end of your base so that you can access the power cord from the outer side of the chamber. After positioning it, use the 8 x 2.5 inches or 10 x 2.5 inches screws to attach the supports to the bottom of the base and the top of the upper frame.
Attach the Back-Side and Front Supports
Remember that two will serve as door frames as you attach the front supports. When attaching the backside supports, keep in mind to space them evenly alongside the space covered by your chamber.
After attaching the top and bottom through the support arms and the fridge fitted between the supports, you may add the casters. Five gallons of beer, for instance, weighs around 40 pounds, plus the weight of the fridge and the structure.
Bearing this in mind, make sure you use casters of the same size that can handle the weight of your chamber.
Sheath the Backside
It is in this step that I add the OSB. Measure the backside of your chamber from the bottom of your base and the bottom of your top frame. Ensure you take full coverage measurements, as sheathing allows me to mount the insulating foam sheets in a later step.
If possible, use complete insulation sheets to reduce the chances of air leaks. Continue adding sheathing and insulation sheets as well.
It is easy to add the insulation sheets when the structure is more open than waiting until it is almost fully enclosed. I recommend using rigid insulation sheets for they are easy to cut precise pieces.
Insulate the Ceiling, Floor and Back
Add the insulation sheets between the support structures and in front of them. Make sure you have double-thick foam insulation covering most parts of the wall at the end. Use aluminum tape to seal all gaps and edges between foam/wood and foam/foam as you add the insulating sheets.
Remember, this is a crucial step; the more cautious you are, the more efficiently your chamber will cool or heat your beer. When you are through, you should have insulation on the ceiling, on the floor, and on the back wall of your chamber. The insulation on the ceiling and floor should be similar to the dimensions of your fridge.
Insulate and Sheath the End Opposite the Fridge
Only after you are through insulating the back wall, floor and ceiling should you insulate and sheath the chamber opposite the fridge. Sheath the outside using a piece of OSB, then use rigid foam insulation between the supports and on top of them.
Seal all the openings with aluminum tape when you are finished. The end of the chamber with the fridge should be left completely open to help in heat dissipation. Ensure not to enclose the fridge wholly; If so, you ruin the chances of cooling efficiently and pose a risk of fire.
Insulate the Remaining Parts
Running the insulation part-way down the side of the fridge, insulate the gap between the fridge and the door support. If you carefully and accurately follow the procedure, you should have everything done except the front. You should have a big door, a gap between the start of the fridge and the support.
Before installing sheathing, you should add insulation between the start of the fridge and the support. Remember not to cover the whole fridge with insulation as some mini-fridges use their sides for heat dissipation. Leaving it uninsulated allows heat to escape towards the back opening left for the fridge.
Except where the door goes, add sheathing to cover the whole front. Ensure you leave half the width of the door frame unsheathed to create room for the hinges to swing properly and the door to sit against the support.
Make the Door
Take the measurements of the unsheathed area where you will place your door. From the dimensions, subtract about 1/2 inches so that your door fits into the opening, leaving room for hinges operation. The ½ inches dimensions might need to be a bit bigger depending on the hinges you choose.
You can place your hinges against the area you sheathed and try to operate them to determine whether the clearances are right. After cutting the door, try fitting it, and once you’re satisfied, install it using two barrel-bolt locks and two hinges.
After installing the door and ensuring it is working properly, add some foam tape around the area; it touches the frame when you close it. Although this makes closing the door a little harder, it makes sure you have properly sealed most of the air gaps between the frame and the door.
Insulate the Door
Insulating the door interior is the final step in making the beer cooler efficient. Have someone lock you inside the chamber to mark the appropriate insulation area, then cut the insulating foam that matches it.
You may make a rough estimate if you don’t have someone to lock you in or your beer cooler is too small to climb in.
Add Temperature Options
The ability to control the temperature of a chamber during active fermentation is the most important aspect when building a fermenting vessel. Typically, the temperature during fermentation will directly impact the flavor and taste of the finished beer and can cause off flavors.
For instance, fermenting beer at a temperature above the recommended range can make it end up generating a harsh flavor of fusel alcohol or excessive fruit-flavored ester. On the other hand, fermenting beer at a temperature below the recommended range of that given yeast strain might make your fermentation incomplete or sluggish.
Fortunately, there are many temperature controllers that you can use for fermenting beer in your chamber, depending on your taste and preferences. Here are some viable control options that you can use for fermenting beer in your fermenting vessel.
BrewPi
BrewPi is a collection of components that operate together for heat exchange, to handle the heating and cooling of the chamber. It is typically a proportional integral derivative controller system. Meaning, it uses some mathematical algorithms to automatically detect and adjust the cooling or heating of the chamber. The elements in the BrewPi system include:
- Relays
- Raspberry pi
- Cooling device
- Temperature sensors
- Heating device
- Arduino
In my case, the cooling device is the fridge. The BrewPi allows the addition of a small heater to the interior of your chamber. The addition of the heater helps to keep the temperatures up during the cold seasons.
In turn, this makes it possible to maintain the right temperature throughout the fermentation process. Here is how to set up the BrewPi chamber temperature controller.
Arduino Setup
Arduino is a prototyping platform and is mostly used to develop and test projects that use microcontrollers. It can read and process inputs from sensors, processing commands, and giving outputs.
To use Arduino to control the chamber temperature, you need to develop a shield that attaches to the connecting pins of this prototyping board. Connect the temperature sensors and relays to the board and connect the shield to Arduino.
However, you will need some soldering skills to connect the different components to the shield. Typically, the Arduino will communicate between the user interface, relays, and the different temperature sensors. The Arduino then attaches to the Pi through a USB printer-style cord.
Raspberry Pi Setup
The Raspberry Pi uses the Linux platform. You will have an option of using the Raspberry version Pi B+, Raspberry Pi 2 B, Raspberry Pi 1 A, and the latest Raspberry version 3. Here are some things you need when using Raspberry Pi:
- Wi-Fi Dongle or ethernet connection
- Mouse or a keyboard to use the graphical interface
- A power source is required
- A B+ model of microSD card
- A PC that can read the microSD card
- An HDMI cable and a TV or a monitor to use the graphical user interface
Alternatively, you can log in remotely without using the graphical user interface.
Keeping your Pi in a protective casing is advisable as it will not be far from the chamber. Once you are through with setting the BrewPi chamber temperature controller, you’ll be able to accurately control the fermentation temperature depending on the type of beer you are brewing.
InkBird
The InkBird dual-stage controller is another easy-to-use temperature controller. Considering that this is an electronic temperature control option for fermentation chambers, you will need to make a small hole at the back of your chamber through both foaming and sheathing to get temperature probes and wires in the chamber.
It features two power sockets that plug the heater (heating) and the fridge (cooling). You can attach a temperature probe through a long cable that goes into the fridge touching the outside of the fermentation chamber.
InkBird Temperature Controller Setup
Whether you’re using the regular or Wi-Fi version of the InkBird temperature controller, you can program them using the controller. Using the buttons on the front panel, set your desired temperature on the controller.
After plugging the InkBird dual-stage controller and setting your desired temperature, place the ceramic reptile heater, temperature bulb, or any other heating device that you are using inside the fermentation chamber.
When the temperatures are low, mostly during the cold seasons, it decides which channel to turn on/off. Remember to seal the holes to reduce loss of efficiency.
STC 1000
The STC 1000 is another temperature controller you can use to make a simple on and off the controller that can react to your brew temperature. Here are some things to note about STC 1000.
- It comes with a red display and features three digits showing the temperature value with one decimal place.
- It features four buttons below the display, which allows you to control the thermostat STC 1000.
- The first button is for switching the STC 1000 on and off.
- The SET button with the plus and minus arrows are for menu navigation, helping you increase or decrease the values.
- The display features three diodes, one showing when the thermostat is actively cooling, the other one shows when the thermostat is on and actively heating, and the third one shows when you set the thermostat.
- It comes with three terminals: terminal 1-2 for power outlet connectivity 110/220 volts, terminal 3-4 for temperature sensor connectivity, terminal 5-6 for heating relay connectivity, and terminal 7-8 for the cooling relay connectivity.
- You can connect the STC 1000 temperature controller sensor to 3-4. It uses the classic NTC10K temperature sensor with an active iron end. Typically, it is around 80 cm long
- You will have to calibrate the temperature manually in the STC 1000. It is possible to make the calibration accurate by comparing it with a verified thermometer and then decreasing or increasing the temperature after 0.1 C steps.
Keep in mind that STC 1000 comes with different temperature controller variations, including:
- Temperature displaying in celsius grades
- Temperature displaying in Fahrenheit grades
- 110/220V universal for European and US markets
- 220V for the European market
When purchasing one, consider the version carefully to ensure it meets your power outlet specifications and the temperature reading expectations.
Why It Is Important to Have a Fermentation Chamber
One of the main challenges that other brewers face is the beer having awful flavors, off-tastes, and a slight presence of phenols. In most cases, this results from the exposure of the fermenter to light or a lack of the right temperature control.
Flavor
The first step to ensure that your beer doesn’t get off-flavor is to ensure the yeast doesn’t change its metabolism during fermentation. The ability to use the right temperature controllers in a fermentation chamber ensures the yeast retains its metabolism, and the beer doesn’t get off-flavors.
Yeast Viability
When you maintain the right temperature for a particular yeast strain, the yeast grows healthy, and the resulting beer is well-balanced. The same happens if the temperature is not right for that yeast strain. It will die, and you will have to restart the fermentation.
A yeast energizer is essential for restarting a stalled fermentation or strengthening an existing one.
UV Light
Apart from the benefit of better control when using a fermentation chamber, it also prevents UV light from reaching the fermenter. UV light may spoil your beer by increasing the temperature inside the fermenter or by initiating a chemical reaction that makes the beer taste skunky.
A fermentation chamber eliminates this problem by ensuring the fermenter is enclosed.
Do I Need to Sanitize My Fermentation Chamber After Building?
It is important to know how to clean and sanitize a fermentation chamber right from when you build it. You might need to clean or sanitize it immediately after building or sometime later after something goes wrong with fermentation.
Suppose the gravity is high and the temperature is slightly warmer, from around 68 degrees Fahrenheit to 76 degrees Fahrenheit during fermentation. In that case, you might end up with an unwanted residual at the bottom of the fermentation chamber.
Common Signs That You Need to Sanitize the Fermentation Chamber
The most common signs that you need to sanitize a fermentation chamber are a sour smell and the growth of a green or blue mold. If that is the case, you can use a bleach-water solution to clean the fermentation chamber and then leave it open to dry.
If drying can be an issue, especially during winter, you can consider using a towel to dry it as much as you can and then leave it open. However, you need to clean and sanitize the towel to avoid reintroducing the sour smell.
How Do I Cool My Fermentation Chamber?
The best way to cool a fermenter is to use evaporation, the same criteria my body use to cool myself during a hot sunny day. Instead of evaporating the wort itself, place your fermenter in a pan of water.
Soak a piece of cloth in the water and put it over your fermenter, but ensure that its bottom dips in the water all the way around. Placing a fan near the piece of cloth will increase airspeed and consequently increase the evaporation rate. Due to this, the fermenter holds around 10 to 15 degrees below the air temperature.
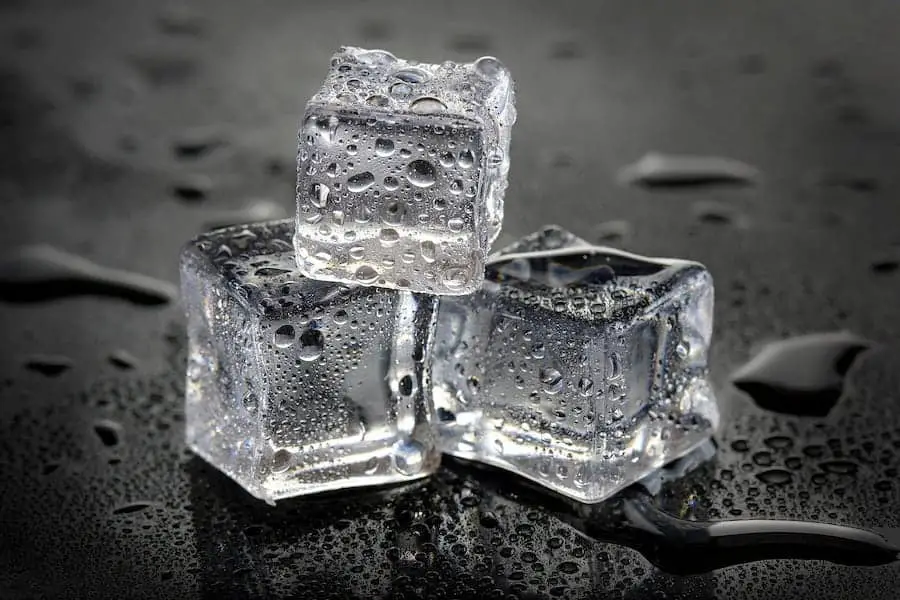
Cooling the Fermentation Chamber Using Ice Cubes
A more aggressive method of cooling an ongoing fermentation is by surrounding the fermentation vessel with water and then adding some ice cubes in the water. This method will require you to monitor and add more ice cubes, as they’ll be melting throughout during active fermentation.
Frequently Asked Questions
Can I Turn a Freezer Into a Fermentation Chamber?
Yes, you can turn a chest freezer into a fermentation chamber, though the temperature controller requires a little wiring. Wiring can be done on the temperature controller, allowing it to plug on the wall, and the chest freezer plugs into the controller.
The controller’s temperature sensor is placed in the freezer for accuracy, preferably the fermenter. Unless you want colder temperatures than the freezer can do, you should not use the controller in the freezer.
Typically, the wiring allows you to control the right temperature precisely to avoid stalling or stopping the fermentation in a too-cold environment.
Which Temperature Should I Set In a Fermentation Chamber?
The normal fermentation temperatures for ale range from 68 degrees Fahrenheit to 72 degrees Fahrenheit, and the fermentation temperatures for lagers range from 45 degrees Fahrenheit to 55 degrees Fahrenheit.
Keep in mind that active fermentation can generate sufficient heat to warm a 5-gallon batch of beer by around 10 degrees Fahrenheit to 15 degrees Fahrenheit. The best temperature to use will depend on your recipe, the next batch and the yeast strain you are using.
Final Thoughts
A fermentation chamber will protect your fermenter vessel from UV light, spoiling your beer. It is possible to regulate your fermentation temperature with the fermentation chamber depending on the yeast strain. With the above guide, you’ll have no problem building your fermentation chamber, improving your technical skills, and continue this rewarding hobby.
