If you buy something through a link in our posts, we may get a small share of the sale.
Fermentation is the backbone of brewing, and a conical fermenter is often seen as the best way to do it. With your own fermenter, you’ll be able to produce great-tasting beer while saving money. Therefore, understanding how to build a conical fermenter cheap is a must for any homebrewer.
Contents
How to Build a Conical Fermenter for Cheap
To build your fermenter cheaply, ensure to get the available resources, including a large food-grade bucket, a conical fermenter kit, a stand, and an airlock. You will also need some basic carpentry skills and access to a few tools.
The most expensive part of the entire process is the cone, which can be made from either stainless steel or plastic. Experienced brewers will tell you that stainless steel is better since it’s easier to clean and doesn’t scratch as easily. It’s also more durable so that it will last longer. However, plastic is a lot cheaper and can be just as effective if you take the time to clean it properly.
After assembling all the materials, find a good place to set up your workspace free from distractions. You don’t want to be interrupted while working on such a delicate process. Ensure you have a level surface to work on and layout all your materials in an easily accessible manner. If all set, you can now start building your fermenter.
Step by Step Guide on Building a Conical Fermenter for Cheap
Building the fermenter is extremely easy and requires materials that are readily available even in your local stores. Moreover, the entire process is straightforward and can be completed within a few hours. Here’s a step-by-step guide on how to go about it:
Gather the Required Materials
The first step is to ensure you have the required materials for the project. For this, you’ll need a large food-grade plastic container (preferably with a capacity of around 5 gallons), a small drill, a 3/4-inch drill bit, some silicone glue, a PVC pipe (with an inner diameter of around 3/4 inches), a plastic funnel and a spigot.
These materials are readily available and can be easily sourced from your local hardware store. You can also get them online to save yourself the trouble of driving around town looking for them.
Prepare the Container
Once you have all the required materials, the next step is to prepare the container. Start by drilling a hole in the center of the container’s lid using the ¾-inch drill bit. This is where the spigot will be fitted later on.
Next, apply some silicone glue around the hole’s edges and then insert the spigot. Make sure the spigot is snugly fitted and there are no gaps around it. Leave the glue to dry for a few hours or follow the manufacturer’s instructions.
The spigot should be pointing downwards when you’re done. This ensures the beer flows out easily when you’re ready to bottle it.
Fit the Funnel
The next step is to fit the funnel. This is a relatively simple process and can be done by simply inserting the funnel into the spigot. Make sure the funnel is a tight fit, so there are no gaps around it.
You can also use silicone glue to secure the funnel in place if you’re worried it might come off. Again, leave the glue to dry for a few hours before proceeding to the next step. Ensuring tight-fitting is to avoid any spillage when you’re transferring the beer from the container to the bottles.
Cut the PVC Pipe
The next step is to cut the PVC pipe into two pieces. One piece should be around 6 inches long, while the other should be around 12 inches long. These pieces will be used as the inlet and outlet for the beer, respectively.
Apply some silicone glue around the edges of the holes and then insert the PVC pipes. Ensure the pipes are snugly fitted, and there are no gaps around them. Leave the glue to dry for a few hours or as per the manufacturer’s instructions, and then proceed to the next step.
Assemble the Fermenter
Once the glue is dry, the next step is to assemble the fermenter. Start by screwing the lid onto the container. Make sure the lid is securely in place, and there are no gaps around it. Next, take the 6-inch PVC pipe and insert it into the spigot. Make sure the pipe is a tight fit so there are no gaps around it.
Now, take the other end of the PVC pipe and insert it into the funnel. Again, make sure the pipe is a tight fit to avoid any spillage. The final step is to take the 12-inch piece of PVC pipe and insert it into the container.
Put the fermenter on a stand, if you have one so that the spigot is at a lower level than the outlet. This will ensure the beer flows out easily when you’re ready to bottle it.
Test Your Fermenter
Once the fermenter is assembled, the next step is to test it. Start by adding some water to the container and then closing the lid. Next, open the spigot and check if the water flows out easily. If it is, then your fermenter is working as it should.
If you’re satisfied with the results, you can brew your beer. If not, you’ll need to troubleshoot the problem and fix it before proceeding. For instance, you may need to check if the pipes are fitted snugly or if there are any gaps around the spigot.
Additional Information
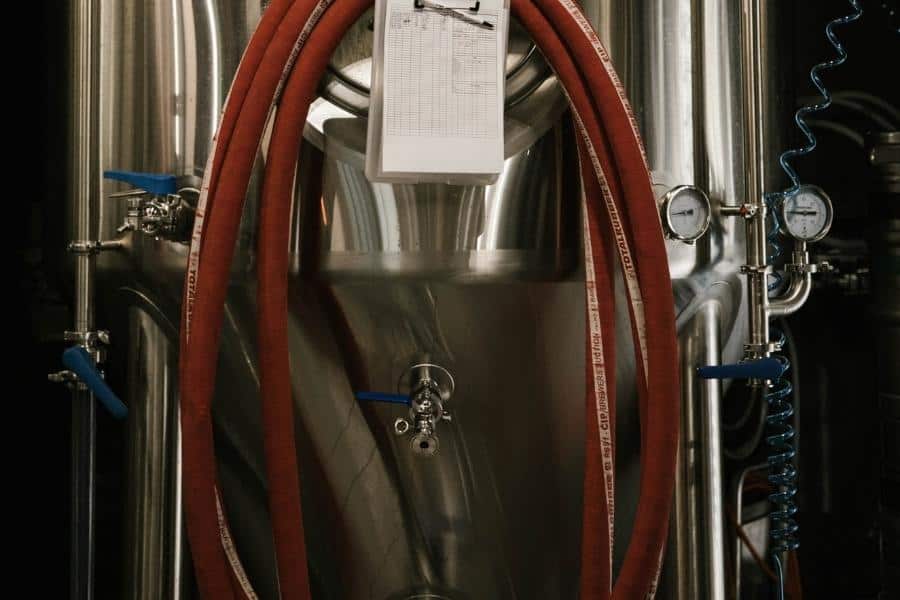
To make the fermentation process easy and successful, the pressure gauge is a must-have tool. It is advisable to get one that can measure up to 30 PSI. This way, you can keep an eye on the pressure inside the container and ensure it doesn’t get too high.
You’ll also need a blow-off tube to release the pressure inside the container. This is important as it prevents the beer from exploding inside the fermenter. The blow-off tube can be made from a piece of PVC pipe.
Finally, you’ll need some bottles to store the beer. You can either use store-bought bottles or recycle used ones. If you’re using recycled bottles, make sure to clean them thoroughly before use so that there are no bacteria present.
Advantages of Using a Conical Fermenter
There are several advantages of using this type of fermenter, which is why it’s the preferred choice for many brewers. The following are some of the most notable benefits:
- Better Brewing Control: One of the biggest advantages of using a conical fermenter is that it provides better brewing control
- Ensures Consistent Results: Another advantage of using this fermenter is that it ensures consistent results. This is because the fermentation process is more controlled, and there is less chance of contamination.
- Easier to Clean: Another advantage of using a conical fermenter is that it’s easier to clean. This is because the sloped sides of the container make it easier to reach all the nooks and crannies.
Frequently Asked Questions
Do Conical Fermenters Ferment Faster?
Yes, conical fermenters do tend to ferment faster, especially if you have mastered how to control their heat and temperature. This is because the sloped sides of the container allow for better circulation of air, which helps the yeast to work more efficiently.
Can You Bottle From Conical Fermenter?
Yes, you can bottle from a conical fermenter. The process is relatively simple, and all you need is a bottling wand and some bottles. The spigot on the fermenter makes it easy to transfer the beer into the bottles.
Conclusion
Instead of buying a new fermenter, building your own conical fermenter is a great way to save money and get more control over your brewing process. With a little effort, you can easily assemble a fermenter that will serve you well for many batches of beer and provide consistent results.
