If you buy something through a link in our posts, we may get a small share of the sale.
Fermentation is a process in which yeast eats the sugars and produces carbon dioxide gas and ethyl alcohol as by-products. So, what does fermentation look like? Let me explore the physical signs of this conversion of sugars to carbon dioxide and alcohol.
Contents
What Does Fermentation Look Like?
The physical signs of active fermentation are swirling bubbles or yeast cake forming on top of the fermenting beer (krausen) as well as bubbles of gas escaping through the airlock. In some cases, a trub might form at the bottom of the fermenter.
Although these are physical signs that you can see, it is still challenging to spot an active fermentation, especially if the process is sluggish. The process begins when you transfer a cooled wort into a fermenting vessel and add yeast.
However, the first signs of fermentation will appear after pitching your yeast around 12 to 36 hours. Keep in mind that some signs will appear before others.
Bubbles of Gas Escaping Through the Airlock
Bubbles of gas escaping through the airlock are the most noticeable sign of active fermentation. It is also the first sign you can see once the fermentation process begins. The gas bubbles will start forming slowly as the fermentation starts and becomes more vigorous when the fermentation process is most active.
The design of the airlock is to allow the carbon dioxide gas generated during the fermentation process to escape from the fermenting vessel without allowing the outside air to enter. A little sanitizing solution in the airlock can help eliminate any bacteria trying to enter into the fermenting beer.
Considering that other methods might require you to look through the fermenting vessel to see if the fermentation occurs, checking for the gas bubbles might be the best option if you are using an opaque fermenting vessel. However, it might not work if you use a fermenting vessel with leaks.
Swirling Particles in the Fermenting Beer
The swirling of particles in the fermenting beer is more common when the fermentation process is most active and vigorous. The environment becomes so volatile, and you might see protein or clumps of yeast swirling around.
Eventually, this yeast swirling around will clump together to make the yeast cake commonly known as the krausen. Then the protein swirling around falls to the bottom to form the trub and the yeast cake forms on top of the fermenting beer.
However, this sign will only be visible if your fermenting vessel is in a room with a little light and your beer is light-colored. That means you cannot see the swirling with a darker beer, but that doesn’t mean fermentation is not taking place.
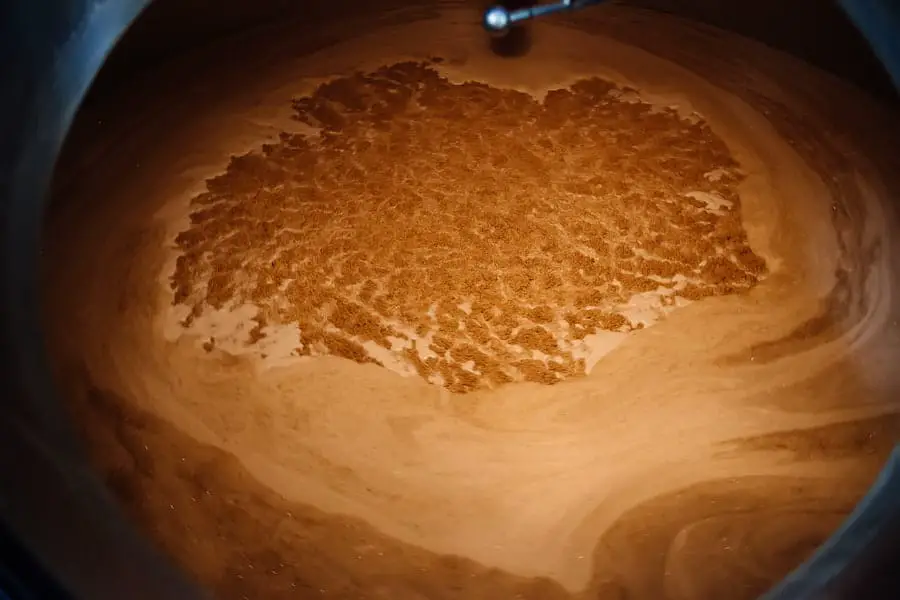
Krausen Forming on the Top of the Fermenting Beer
Krausen will start to appear after some time in the fermentation process. After the yeast eats the sugars, grows, and multiplies, it will start clumping together to form a yeast cake. It looks like a gooey clump of yeast that will start floating on top of the fermenting beer.
However, if you don’t notice the formation of krausen during the fermentation process, it doesn’t mean that there is something wrong with it. The process could be very vigorous, breaking down the yeast clumps and falling into the beer mixture.

Keep in mind that the krausen will still break down and fall to the bottom of the fermenting vessel as the fermentation process nears the end. That means you can still use this sign to determine when the fermentation process is complete.
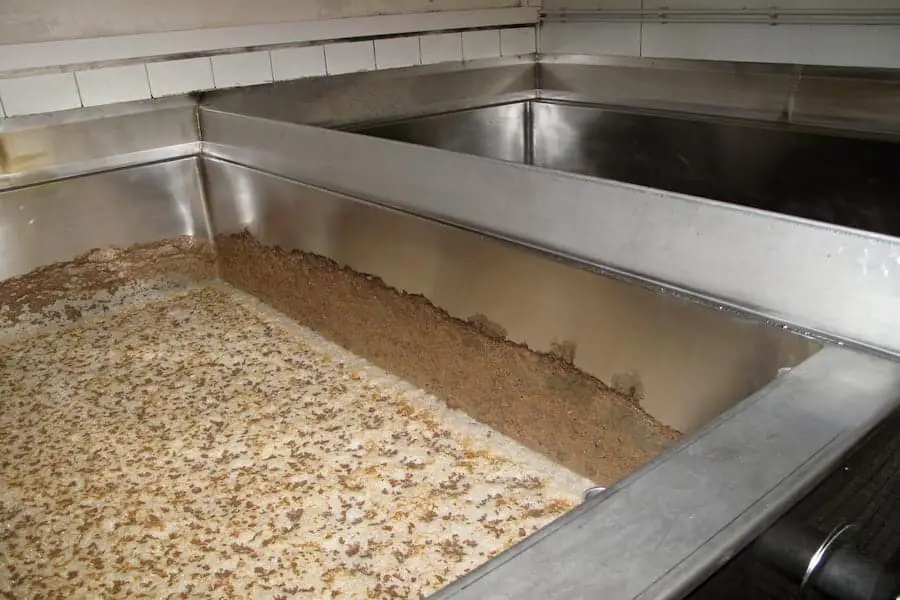
Formation of Trub at the Bottom of the Fermenting Vessel
The same way yeast clumps up together and forms on top of the fermenting beer, the proteins collect together and fall to the bottom of the fermenting vessel. Some hop materials and other elements also collect up with the proteins.
Keep in mind that these materials can only clump up and fall to the bottom of the fermenting vessel if the fermentation process occurs. That means the formation of trub is the most reliable sign of fermentation. However, you will not see it using an opaque fermenting vessel.
Blow-offs
You can use a blow-off to observe how the fermentation process occurs, especially if you’re using a glass carboy to ferment your beer. In most cases, the mouth of a glass carboy is around 1.5 inches wide. Improvise your blow off with the following steps:
- Look for a hose pipe with an outside diameter of 1.5 inches.
- Push one end of the hose pipe to the mouth of the fermenting vessel
- Create your airlock by dipping the other end of the hose pipe into a glass jar full of water. Usually, it is the best way to create an airlock considering that the headspace of a glass carboy is minimal.
In most cases, dead and live yeast, proteins, hops, and foam will form and foam out of your hose pipe and get into the jar of water.
This way, you’ll be able to see when the fermentation process starts, when it gets vigorous and when it nears the end. However, you might lose some beer if the fermentation process is too vigorous.
Primary and Secondary Fermentation
There are two stages of fermentation when brewing beer, primary fermentation, and secondary fermentation. The signs of fermentation in these stages are distinct.
Primary Fermentation
Primary fermentation is the first stage of fermentation when you’re making beer. The primary fermentation starts when you take your wort from the initial boil, cool it to the right fermentation temperature, transfer it to the fermentation container and then pitch yeast.
After pitching yeast, the yeast starts to eat the sugars, producing alcohol and carbon dioxide as waste. The signs of primary fermentation start to appear around 48 hours after pitching yeast.
Secondary Fermentation
Secondary fermentation is the fermentation during the aging period after primary fermentation. It involves siphoning and transferring the beer from the primary to the secondary fermentation vessel. Considering that much of the fermentation is complete, the yeast activity is minimal.
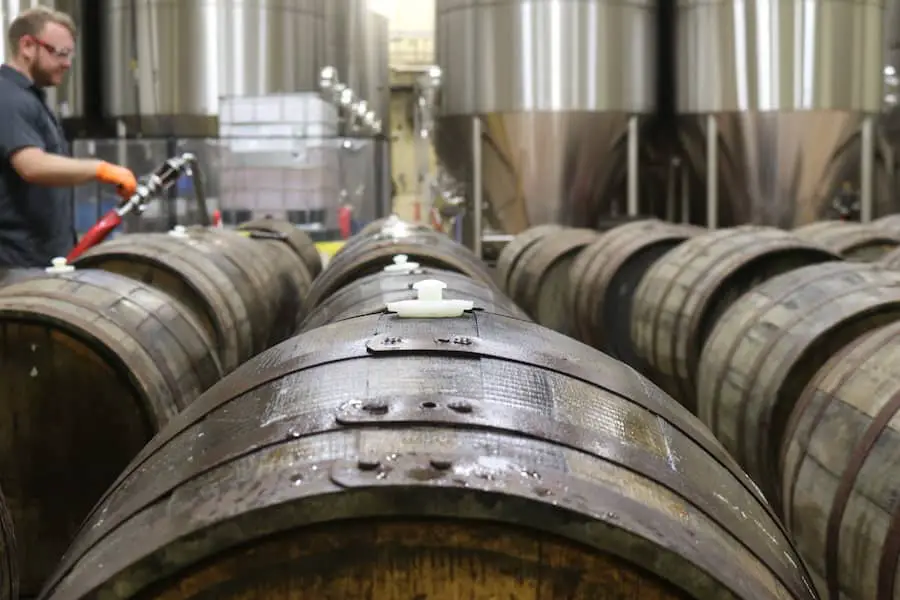
Due to the sluggish fermentation, secondary fermentation is also known as the conditioning phase. Typically, the essence of secondary fermentation is to allow the aromas and flavors of the beer to blend. It is also the time the yeast can drop out of the beer solution, making the final beer clear.
The secondary fermentation process can take around one week to six months. The most common sign of secondary fermentation is the production of gas bubbles. However, if there are no fermentable sugars, you won’t notice anything, and you’ll have to take a gravity reading.
Bottom and Top Fermentation
Although the ideal fermenting temperature for many brewing yeast strains is around 55 degrees Fahrenheit to 75 degrees Fahrenheit, different strains of yeast ferment best at different temperatures. For instance, the ale yeast strain will ferment best at a temperature range of around 65 degrees Fahrenheit to 75 degrees Fahrenheit.
If you lower the temperature, the fermentation will become sluggish. Raising the temperature above the ideal range will make the beer develop off-flavors. High temperatures can even kill the yeast before the fermentation process is complete.
Due to these differences, yeast strains fall into two categories, the bottom-fermenting or lager yeast and the top-fermenting or ale yeast. These yeast strains differ in their ideal fermentation temperatures, and the signs of an ongoing fermentation are as follows.
Bottom Fermenting Yeast
The bottom-fermenting yeast, also known as the lager yeast, converts the sugar best at cooler temperatures of around 41 degrees Fahrenheit to 50 degrees Fahrenheit. As the name suggests, the bottom-fermenting yeast drops to the bottom of the fermenting vessel when the fermentation process completes.
That means you can check whether the fermentation is taking place or complete when using the bottom-fermenting yeast by checking the bottom of the fermenting vessel. Typically, fermenting at cold temperatures means the fermentation process will be slower, which, in turn, extends the primary fermentation time.
In most cases, the primary fermentation takes around 10 to 14 days when using lager yeast. Although lagering describes the bottom-fermenting yeast, the resulting beer style is also known as a lager. The most common lager beers include malt liquors and pilsners.
Top Fermenting Yeast
The ale or the top-fermenting yeast ferments best at a warmer temperature of around 50 to 77 degrees Fahrenheit. This yeast strain is known as the top-fermenting strain because it rises to the top of the fermenting vessel during active fermentation.
In most cases, the yeast cells of the ales yeast strain float on top of the fermentation vessel as they hitch a ride with the carbon dioxide molecules as the molecules go up to the top of the fermentation container. This yeast strain works best in warmer temperatures, so rapid fermentation.
Usually, the fermentation completes in a few days. The resulting beer style is known as the ale when using the ale yeast. You can know that an active fermentation is taking place or is complete when using top-fermenting yeast by checking at the top of the fermentation vessel.
Key Fermentation Tips
After pitching the yeast and keeping your fermentation vessel under the right temperature range, you can improve fermentation with these tips:
- Adequately aerate your fermenting beer as the yeast will need sufficient oxygen to eat the sugars and convert them to alcohol and carbon dioxide gas.
- Considering that yeast will need micronutrients for healthy fermentation, it is advisable to add some yeast nutrients.
- If the final gravity of your beer falls short of your target gravity, consider arousing the yeast by stirring it with a sanitized racking cane before undertaking additional measures.
- During the secondary fermentation and aging, try to protect the beer from oxygen. Any exposure to oxygen can lead to spoilage.
- When you plan to age a beer for a long time, like several years, consider periodic sampling to ensure it is still good.
- Try to keep the beer sterile by sanitizing everything that touches the beer to minimize the chances of infection and spoilage.
- When cooling the wort, cool it rapidly to minimize the chances of infection and increase the fallout of proteins.
Final Thoughts
So, what does fermentation look like? Fermentation is a process you can only know is taking place by observing signs such as gas bubbles through the airlock, yeast cake forming on top of the fermenting beer, and trub forming at the bottom of the fermentation vessel.
